Pages

Showing posts with label melissa elsner. Show all posts

Wednesday, June 22, 2016

Summery Water Coloured Cards


Melissa Elsner


Hey there! Melissa here and I’m so excited that Summer is finally here in the northern hemisphere. It’s my favorite season as the days get longer and warmer. You’ll usually find me hanging outside with friends with a cool beverage in hand. I also love opening the windows all the way while I craft the weekend days away. 
Today, I’m sharing two cards using the Sunny collection. The bright colors and icons are so perfect for a card celebrating Summer.
For each of these cards, I began the design with some paint and ink. I did a layer of clear gesso so that the watercolors would remain vivid and bright and not fade into the paper. Once the paint dried, I added the splatter and then built the rest of the design for each card. 
For the first one, I had some fun with the sunshine:


The sun rays were cut from the border strip of patterned paper. To add some yummy texture, I took my sewing machine and did some stitching along the rays. 


Now, let’s move on to the next card. I love to layer on my layouts and, it isn’t any different with my cards. I love the challenge of figuring out how to combine as much color and pattern, without overwhelming. The trick is making sure I have a strong focal point which would be the flamingo, who then draws your eye to the sentiment that is popped up. 

When it comes to layering on cards, I find that using thin strips of the patterns work perfectly. You can still pack in a punch but on a smaller scale that makes sense for a card.

Isn’t that flamingo so fun? I’ve been dying to use it and was so happy to use it on this adorable card! I can’t wait to give this away to celebrate summer with someone!


Are YOU ready for summer? Bust out your Sunny collection and have fun documenting the memories and, hey, make some cards too!
Thanks for joining me today.

Imaginisce Supplies Used: Paper, die cuts, stamp: Sunny Collection

Friday, June 10, 2016

The Best Dad Ever!

Our Parrrty Me Hearty collection has been a big hit this past week for our Father's Day theme and our DT have been knocking it out of the park!!!


Melissa Elsner

Hey everyone,
Melissa here with a couple of projects that will have dad feeling t-arrrrr-ific! Yeah, that was a stretch but, I had to get some pirate talk in because I used the awesome Parrrty Me Hearty collection! 
Here is the entire gift set and then, I’ll dive into all the fun details:


A card a box of treasure! For my dad, I will probably fill that box with his favorite nuts and snacks. I love how the plank paper worked perfect to create that treasure box. Let’s take a closer look, shall we?


I found the cut file shape in the Silhouette Store. After cutting it out, I had some fun embellishing it with foam jewels and lock. I’m always paying attention to the small details like, adding some layering and dimension to the jewels. 


For the die cuts hanging out behind the chest, I used a straw and adhered the two die cuts to the front. Super easy! What I didn’t think of, though, was that the lid can’t open all the way with it behind there. My tip to pass on to you, is put it on the side, instead of the back. 


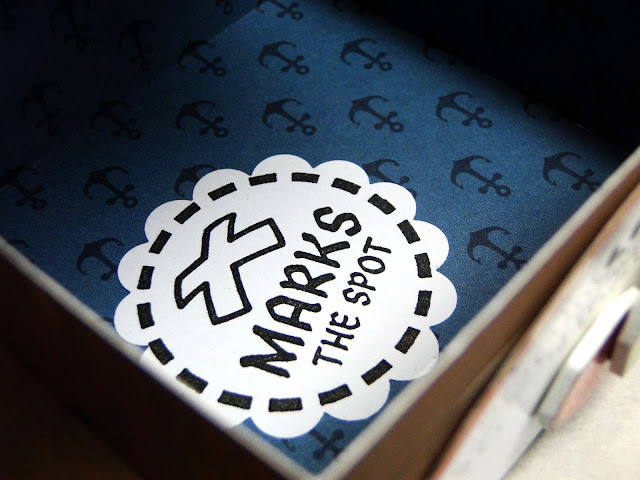
There is one final surprise and detail to this treasure chest and that is what is inside. I love the stamps that come with each collection and though the x marks the spot stamp would be perfect!


Now, let’s move on to the card. I love getting inspired and gaining ideas from other projects for Father’s Day. But, I find so much about fishing and such and that is so not my dad. Then, I found an awesome tutorial on how to make an origami tie shape. Perfect! Here is how it looks on the card with the sentiment:


Doesn’t that look great? The minute I put it on the card, I was so happy. It really didn’t need anything else but, since I’m going with the pirate theme here, the skull was the perfect touch for the die. I used some black twine to attach it which, also added some texture. 


The sentiment took a little time to figure out. I didn’t want to cover the tie very much and so, opted to use letter stickers to spell out a cool phrase. And I do have the best dad ever. 


There you have it! A fun card and gift set all ready for my dad. I sure hope he likes it! Have a creative day!

Imaginisce Product Used: Paper, die cuts, foam shapes: Parrrty Me Hearty Collection

American Crafts Product Used: Twine, Letter Thickers

Friday, May 27, 2016

Thank You Card Set

We hope that you all have a great Memorial Day weekend!!
Check out these awesome cards and video tutorial by the talented Melissa!


Melissa Elsner


Hey everyone,
Melissa here with you today and I’m sharing two cards that could be perfect to give to someone who is either serving, has served or is a surviving family member in the military. Memorial Day is an easy holiday to get wrapped up in bbq’s and an extra day off but, I try to take time to remember what this day is truly set aside for. So, because I love to create and give to others, it was natural to want to make some cards.
For these two cards, I dug into the Sunny Collection and pulled out red and blue along with yellow to accent the ‘patriotic feel’. As an added bonus today, I’ve also included a process video that showcases me creating these cards from start to finish. In the video, I give a few tips and walk you through my entire process. If that’s not your thing, no worries! I’ll still give you some good information on this blog post today.
If you want to skip to the video, you can check it out right here…


Let’s begin with the first card.

I cut out the star cluster with my Silhouette Cameo. That shape is found in the Silhouette library and I thought it would great on a card. I punched out some small stars and adhered them with some pop dots, onto the card.

I absolutely love the versatility of the letter stickers in this collection. Not only do they work great on layouts but, they are the perfect size to create sentiments on cards. And I love the sheer; almost vellum quality to them. The blue-green color really does look great with the red and white, already on this card.
Finally, I finished this one off by adding some wood veneer embellishments.


Now let’s move onto the next card…

For this card, I also used my Cameo to cut out the star shape. I wanted to include as much color as possible and, thought a grid design would work nicely. It would also balance out the overall design of the card. 
Pop dots are such a great way to create dimension and interest on projects… even cards. They can take a flat (and sometimes boring) design and raise it up a notch. Literally and figuratively! 

I was going to use some plain jute for this card but, decided to throw in some color. I had to keep with the patriotic feel! 
For the sentiment, I wanted it to stand out so, I stamped it on some white cardstock and matted it on the blue patterned paper. 


Finally, there was just one thing missing and, I always find that ink drops help with that problem. I used some Heidi Swapp mist and sprinkled that all around to help complete this card.
Some other quick tips when it comes to my card making:
I always score my 8.5 x 11 inch paper before cutting it in half. In my head, this speeds up the process and I’ve already got the other half of that cardstock ready for the next project. 
Sometimes my cards don’t lay flat on my workspace and I find that laying my bone folder on the bottom flap, helps keep it down while I’m pushing around the papers and elements. 
Thanks for joining me here today! 


Supplies:
Imaginisce Product Used: Paper and Letter Stickers from the Sunny Collection

American Crafts Product: Twine

Monday, May 16, 2016

Fun in the Sun

Our Card Queen on the Imaginisce Design Team has some hidden talents and today she is sharing this amazing layout on the blog!! Check it out!


Melissa Elsner

Hello everyone,
Melissa here with you today! I don’t know about where you live but, here in the pacific northwest, Spring has definitely made a grand appearance. So grand that it is easy to forget it’s only Spring and think that Summer has arrived. As I type this, though, the weather has reminded me that it is truly Spring. Ha! A couple of weeks ago, I hung out at the beach with friends and captured a great photo. It was begging to be scrapped and, of course, I had the perfect collection on hand to use! The Sunny collection, naturally. 
Here is the page I created:

How nostalgic and wonderful is that photo? I randomly snapped it but, just love this photo of my friends daughter throwing a stick for the dog. It reminded me of my own carefree childhood and the days we spent by the bay. Such fond memories! 
I did something with this page that I haven’t done in years and, that is stitching! I finally dusted off my poor, neglected sewing machine and put it to use! I practically forgot how much I love stitching and how much it can bring a page. 


For the strips on the background, I cut up the strips from the Hello Sunshine sheet of paper. I’ve always dubbed myself as a clean and simple scrapper and what that has turned into is finding simple ways to bring in lots of texture. One of those is utilizing different patterns and colors of strips of paper. It really is simple to trim these and adhere them to the page. 
By adding the stitching on top, another simple thing to do although a bit time consuming, it really does create some beautiful texture and dimension to the page. 
I matted the photo with a few layers so that it didn’t get lost in all the background patterns. I also love how the words were printed on white so they pop out on the patterns. 


Gosh, I don’t know about you but I’m okay with Summer making a slightly early appearance. The more evenings I get to spend at the beach, the better and I’m happy to have such a cute paper collecting to document all these beach memories!

Supplies:
Imaginisce Product Used: Paper, ephemera: Sunny Collection

American Crafts Product Used: Twine, Date Stamp

Wednesday, May 4, 2016

Mother's Day Canvas

With Mother's Day just around the corner our design team has created some great inspiration for you!!


Melissa Elsner

Hey everyone,
Melissa here with a super fun Mother’s Day project. I love making circle punch flowers and have made them on plenty of cards and projects of a smaller scale. When I was contemplating a project for Mother’s Day, the flowers popped into my head. So, I decided to bust out one of my burlap canvases and create a piece of wall décor for my mama and, it would include the flowers. 
Here is the full project:

Pretty, right? I just love the beautiful colors from the Sunny collection! These flowers are so easy, and fun, to assemble. I’ve included a process video that will take you through how I created these. You can watch it right here.


For this project, I wanted to incorporate as much pattern and color as possible. So, each flower is utilizing two different patterns from the collection. I made all three different sizes and used my Silhouette Cameo to cut out the circles. 

For the title, I decided to mix up the font. By using regular letter stickers and script Thickers, I was able to place the emphases on the word Blessed. I really am so thankful for my mom and all that she has done! She really is an inspiration and do count myself as blessed. 

Here are some quick tips should you want to recreate this project… make sure to combine a muted/almost solid pattern with a fun and active pattern. This way, the colors will stand out and the flower will not be overwhelming. Use a glue stick to connect the flower petals as it dries slow enough that you can manipulate and move the petals to make them even. Did you know there is such a thing as 2” glue dots? I had no idea! I find these work best when adhering the two flower layers. No wait! That’s what I’m talking about!

Finally, you can use whatever center you want for your flowers. I have used bling, enamel dots, a smaller punched circle with a button and I’ve used brads. Brads are nice because there is no additional waiting time, in regards to drying. The sky really is the limit! 
Thank you for joining me today! Happy flower making!

Imaginisce product used: Paper: Sunny Collection

American Crafts product used: Thickers

Monday, May 2, 2016

New Sketch Challenge & April's Winner

Can you believe it's another new month??  Well, with that new month comes another new fabulous sketch challenge.

We love seeing your creations and hope you'll join us this month.

April Sketch Challenge winner is .....


She created this fabulous page using last month's sketch. Isn't it great?


Congratulations Stephanie.


To claim your prize:
Please send an email to imaginiscewinners@gmail.com no later than Fri., April 8, 2016 and put March Challenge Winner in the Subject Heading.


Now let's see our new challenge ....


MAY'S SKETCH CHALLENGE


CHALLENGE  RULES:

1.  Use this sketch as inspiration to create any type of project (layout, card, home decor, altered item, etc.)
2. You must use at least 75% Imaginisce product on your project.
3.  Use twine or ribbon on your project.


THE PRIZE:
A collection pack of SUNNY

Submit your entires no later than Fri., May 27th, 2016.
Winner will be announced on June 1st, 2016.


Now let's see what some of our design team members created with this wonderful sketch.

Supply List: Imaginisce Sunny Collection patterned paper and ephemera; Imaginisce Par-r-rty Me Heart Collection stickers, Thickers and puffy stickers; American Crafts cardstock; Ranger Texture Paste; Mr. Huey’s mist.


Supplies:
Imaginisce: patterned paper, die-cuts, sticker stacker, stamp (Sunny). American Crafts: cardstock, twine.


**********

Have fun and we can't wait to see what you create!!!

Wednesday, April 20, 2016

Birthday Card Set

Do you like cards? So do we!! And we just love Melissa's creations! She's just so creative.


Hello everyone!
Melissa here with you today and I’m sharing a couple of cards that I whipped up using the Parrrty Me Hearty collection. It’s been awhile since I’ve dug into this adorable collection and, since I’ve had a couple of requests from friends to make birthday cards, I thought this to be such a fun collection to use. I mean, how can you not love the adorable mermaids???
So, something that I like to do, when creating more than one card, is to come up with a similar base design. This helps with time and overall execution of making the cards. I knew I needed to make one for a boy and one for a girl; which, by the way, is another reason I wanted to use Parrrty Me Hearty. There are two collections within a collection – one that appeals to boys and one that appeals to girls! 
I began with the girly card and knew I wanted to use one of the mermaid die cuts. Here is the card:


As you can see, I chose to cover the entire base with pattern and color. I chose to do a diagonal line that split two different pattern papers. This can work when you utilize one sheet that has a lot of colors and patterns going on and pair it with a more calm and subtle patterned paper. 
I just love those puffy stickers and all the fun elements with this collection. To add some fun texture and interest, I used those stickers along the diagonal line. Then, I  layered the cute mermaid in between all that.


Finally, I had to have some fun with the sentiment! The sticker with the word ‘shell-a-brate’ looks pretty adorable with the Thickers, don’t you think?
Now, let’s move onto the boy version of this card design. I’ve been eyeballing the pirate ship die cut for quite some time and wasn’t sure how I would ever use it. Alas matey! I figured it out using this card base design with the diagonal line. Here is the card in its full glory:


For this one, I chose to split the two contrasting patterned papers by color. The red stripe really looks striking against the black skull paper. I placed the pirate ship just a little bit behind the red stripe paper. 
To make this a little fun, I did some tears to add some texture and dimension.  Additionally, I wanted the anchor to look like it was connected to the ship. With a little twine and tucking behind the red stripe paper, I think it works. It’s those simple things that can make all the difference in your projects. 


I really wanted to “rough” this card up so, I took the scroll die cut and rolled it up a bit so it would look a little wrinkly. Here is a little before shot I took, showing how roughed up and distressed it looks.


And there you have it! Two fun cards that any little pirate or mermaid will surely enjoy. 
Thanks for visiting and I hope you have a creative day!


Imaginisce Products Used: Paper, die cuts, stickers: Parrrty Me Hearty Collection

American Crafts Products Used: Cardstock, twine

Friday, April 8, 2016

Sunny Card Set

Wrapping up our FREE THEME month is design team member Melissa with these stunning cards.


Hello everyone,
Melissa here with you today and I’ve got a couple of cards to share. I’ve been eyeballing the 3D stickers in the Sunny collection and thought I would try them out on the cards. Let me tell you, they are so much fun! The great thing with them being so dimensional is that, you don’t need much else on your card. I’ll walk you through my two cards.
Here is the first one using the 3d sticker titled Bon Voyage:


For this one, I decided to a couple of the pattern papers to create a simple card base. Then, I used a canvas tag from my stash to create a layered cluster. This was so easy! All it took was adhering the 3d sticker on top of the tag. And that was it! It’s almost too easy, isn’t it?


Finishing the card off with some twine adds a nice touch, I think. How cute is that card to give to someone, you know, going on a trip?
For the next card, I decided to do some deconstructing of the 3d sticker.


This time, I had to throw in some ink splatters to add some texture to the card. Again, this card was too easy to put together! I took off the word ‘good day’ from the 3d sticker and used it as its own element. 
I dug out a circle tag from my stash and used that to create a modern and simple cluster on my card. I really like how it mimics the suns shape.


I hope that these two cards have you wanting to dig into your 3d stickers! They really are so much fun and work perfectly! Now, go make yourself some cards! 


Supplies:
Imaginisce Product Used: Paper, 3d Stickers, Letter Stickers – Sunny Collection

American Crafts Product Used: Twine

Friday, March 25, 2016

Easter & Spring Card Set

Just a reminder that today is the deadline for our March Sketch Challenge.  If you're still interested in participating click HERE to see the details.


Hello everyone,
Melissa here with you today and I’ve got a trio of cards to share. I love this time of year with Spring arriving and Easter just around the corner. I found that the Sunny collection and some of the Parrrty Me Heart Collection work perfect for creating cards celebrating the new season and upcoming holiday.
Come take a look at what I’ve created!
The first card was so much fun! I found this idea a long time ago via Pinterest and have seen it pop up again in my feed. It’s an egg with strips of paper. I’ll walk you through the process after I show you the photo of the card.


For this card, it’s really simple! You just cut out a piece of cardstock that is the same size as the front of the card. For this card, it would be 4 ¼” x 5 ½”. Then, in the center of the paper, cut out an egg shape; I used a shape from my Silhouette library. Save the cut out egg and trace that onto the card base. 
Then use a bunch of strips of paper or washi tape or fabric or whatever you have to create the design you want. After that, adhere the piece of cardstock with the negative cut out on top. Isn’t that cool? I imagine doing this technique with lots of different shapes such as flowers and hearts. So fun!
The sentiment was stamped with some individual letter stamps in my stash. I love things in a tidy row but, the wonky way the letters landed gives the card a playful look, I think.


The next card uses some paper from the Parrrty Me Hearty collection. I thought the wood paper would work really well for a cross. So, I cut that out with my Silhouette cameo and layered the flower on top. The flower is from the Sunny collection. I finished off the card with some of the letter stickers from the Sunny collection and drawing a black line around the edge.


Finally, I had to commemorate the first day of Spring. Actually, I was having so much fun creating, I just couldn’t stop! So, I’ll end this card trio with a Spring card! I used papers from the Sunny collection for this one and some fun flower cut files from the Silhouette shop. 


The base of the card has some yellow mist and then I layered the flowers off to the side. The triangle strips of paper, along with the enamel dots, help finish off the card. And, I just love those letter stickers from the Sunny collection. Isn’t that font adorable and “springy”?


Well, that wraps up my card trio! I hope that you are finding time to make your own cheerful cards for this most lovely of seasons.


Supplies Used: Paper, Letter Stickers: Sunny and Parrrty Me Hearty Collection

LinkWithin

Related Posts with Thumbnails