Pages

Showing posts with label kids crafts. Show all posts

Friday, January 31, 2014

Valentine's Day Kids Crafts

Children often have Valentine's Day parties at school and hand out little cards & treats.
This next project would be a super great idea for children to share with their friends!
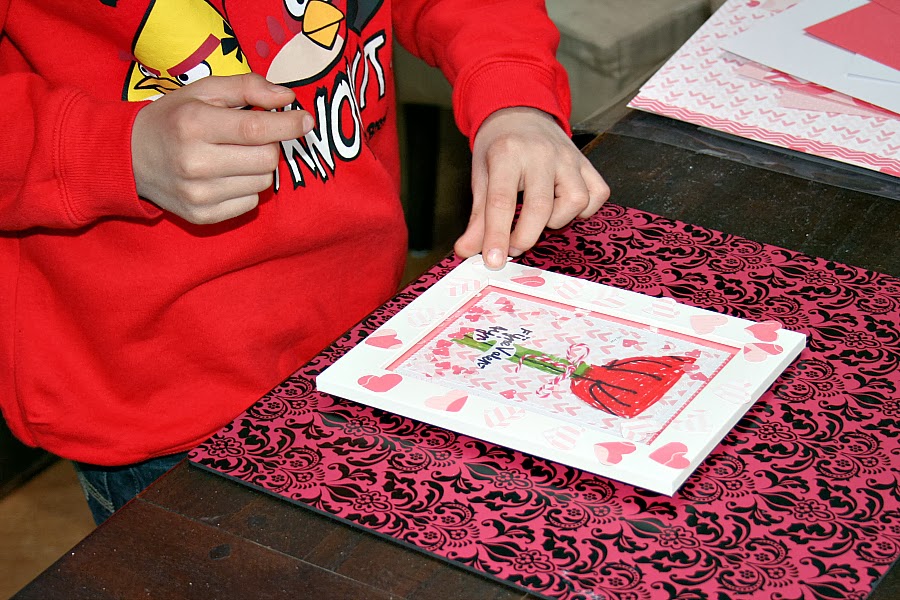

*********


Glow Sticks


These little glow-sticks are actually bracelets.  So, as long as you keep the little plastic piece attached, after your child passes them out...all his/her little friends just need to slip of the arrow attire, and activate for a cool accessory. You won't feel too badly about wasted time, because they are so simple to make! 


I just used a slot punch twice on a die-cut heart, a cut-out piece of chevron patterned paper, and a die-cut tag for the sentiment. Then, I topped the 'arrowhead' with another heart of the exact same size using foam tape. 


To finish it up, I embellished with punched out smaller heart topped with a gem...and tied a little Baker's twine to the end.


Supply List
Imaginisce: Welcome Spring (Confetti, Hello Spring, Die-Cut Tags, Adhesive Gems); My Baby (Sweet Baby Girl, Baby Girl Chevron, Pink Elephants on Parade, Die-Cut Tags)
American Crafts: Baker's Twine (red)

Thursday, January 30, 2014

Valentine's Day Kids Crafts

Children love creating.  They have vivid imaginations and creating something all by themselves is a great accomplishment.
Design Team member, Monique, had the help of her son for today's project and he did an incredible job!


**********


Valentine's Day Frame

When I mentioned what project I was going to do for today, my 9 year old son jumped up and said that he wanted to help! Now, how cool is that? He grabbed his coloring pens and some paper and started drawing this flower for his dad. 


Later that week we went to Ikea to buy a photo frame for his drawing and as soon as we arrived home he said he wanted to decorate the frame. I quickly grabbed my scraps from the new “My Baby” collection (as the pink colors a the design on the “B”side of the papers is just perfect!) and a heart punch and gave those to him. He punched a whole lot of hearts, big and small. 


While he did that I created a background for his flower, layering and stitching the papers. Then we put the flower in the frame, added some punched hearts “confetti” and closed the frame. Last but not least my son adhered punched hearts to the outside of the photo frame. I’m really loving the result!


Supplies: 
Imaginisce: patterned papers (My Baby). American Crafts: cardstock, glue runner.

Wednesday, January 29, 2014

Valentine's Day Kids Crafts

What child would not want to receive a treat box filled with yummy candy?
Check out this cute little box!


*******


Owl Treat Box

Hi Imaginisce fans! Today I am sharing with you a kids craft that I am going to make in my homedaycare. In the past we usually decorate paper brown bags, but this year we are going to step it up a notch and create some fun treat boxes!  Here is the cute Owl Treat Box that I made with the Love You More Collection:


Step One:  Find a box in your recycling bin- I used an ego box, but this craft can be done with any similar sized box.

Step Two: Measure all sides of the box and precut the same patterned paper for each side. Have the kids glue the paper to each side. It doesn't matter if its not perfect as the Washi tape from this collection will help it look "perfect".

Step Three: Add some Washi Tape to cover each side of the box. The kids may need help with this step.

Step Four: You can use scalloped border stickers for the Love You More Collection (like I did) or you can precut four borders from the knock out border punches by American Crafts.


Step Five: Add a strip of double sided tape to the top of the box (where there is an opening for the valentines). Have the kids place little strips of American Crafts Twine to create hair for the Owl.  Add another strip of double sided tape and have them add a bunch of pre-punched small little hearts across the top to cover up any double sided tape.


Step Six:  Precut (or pre punch) Owl pieces ahead of time to make assembly easier for little kids. I cut different sized circles for the eyes  (I used different patterned paper, white cardstock and black cardstock) and two different shaped hearts for the nose and a large circle cut in half for the wings. Assemble as shown.


Step Seven:  Create a bow for the Owl if your kids would like a girl owl. Use the  Tazzel Glitter Tape to create the bow and add foam dots in the middle with two shaped hearts. Adhere to the Owl.


I hope you enjoyed the Kids Craft Tutorial! I am sure your kids will love making these!  Happy Valentines day!


Supplies Used:  
Imaginisce: Love You More Patterned Paper, Stickers, Washi tape; American Crafts: Twine, Glitter Tape, Double Sided Tape, Foam Dots, Glue Runner

Tuesday, January 28, 2014

Valentine's Day Kids Crafts

Children love to help out with crafts & we've got a fun project to share with you today that design team member, Becki & her daughter created.

******

"Be Mine" banner

My eight-year-old daughter and I went a little crazy with the hearts on this project. We kept this project very simple and just stacked the hearts together and added the letters with some foam adhesive. My little girl was able to complete most of this on her own. I did help her with the stitching around the hearts and placement of the letters. 


I love how this project turned out. It's a very simple but cute decoration for my home that my daughter and I made together.


Thanks for visiting us here at the Imaginisce blog! 
Have a wonderful day!

Supplies Used:
Imaginisce: Bling (Girl Bling, Spring Bling), Patterned Paper (Pink Elephants on Parade, Baby Girl Chevron, Sweet Baby Girl, Sweet Song Bird, Pin Wheels and Banners, Confetti)
American Crafts: Kraft Cardstock, White Ribbon, This & That Foam Dots

Monday, January 27, 2014

Valentine's Day Crafts for Kids!

If you have little ones at home  (or even older ones who enjoy crafts) or perhaps you're a teacher than this is a great week to join us for fun & fabulous ideas for Valentine's Day.
A few of our Design Team members have created some projects that are easy enough for children to make.
All you need to do is gather a few supplies, round up your kids and join us here on our blog each day this week!
So, let's get started!


***************


Butterfly Pillow Box

Today I want to share with a fun little Valentine's Day project that your kids would have so much fun creating. These are what I call Butterfly Pillow Boxes. My 7 yr old daughter LOVED helping me make these and I think she did a wonderful job with them! We are going to stuff them with some Valentine goodies and pass them out to her classmates.


To get started you will need these items...


Step 1 - Assemble the pillow box.


Step 2 - Adhere the 2 heart shapes together. Then adhere both to the back of the box.


Step 3 - Punch holes in the top with a paper piercer.


Step 4 - Curl pipe cleaner around a pencil leaving 2" at the bottom (for sliding into the box). Adhere hearts at the top and slide both pieces into the pillow box.


Step 5 - Add eyes and mouth pieces. Then stuff full of fun Valentine goodies!


Supply List
Imaginisce: Pattern Papers (Love You More)

LinkWithin

Related Posts with Thumbnails